


Flotilla IoT provides the user’s module in which users can create, edit, view, or delete other users. It also allows you to assign units, groups, drivers to different users. You need to have access right to create, edit, view, and delete users. Otherwise, users can only view existing users. User can also generate the public login link to login into the flotilla IoT.
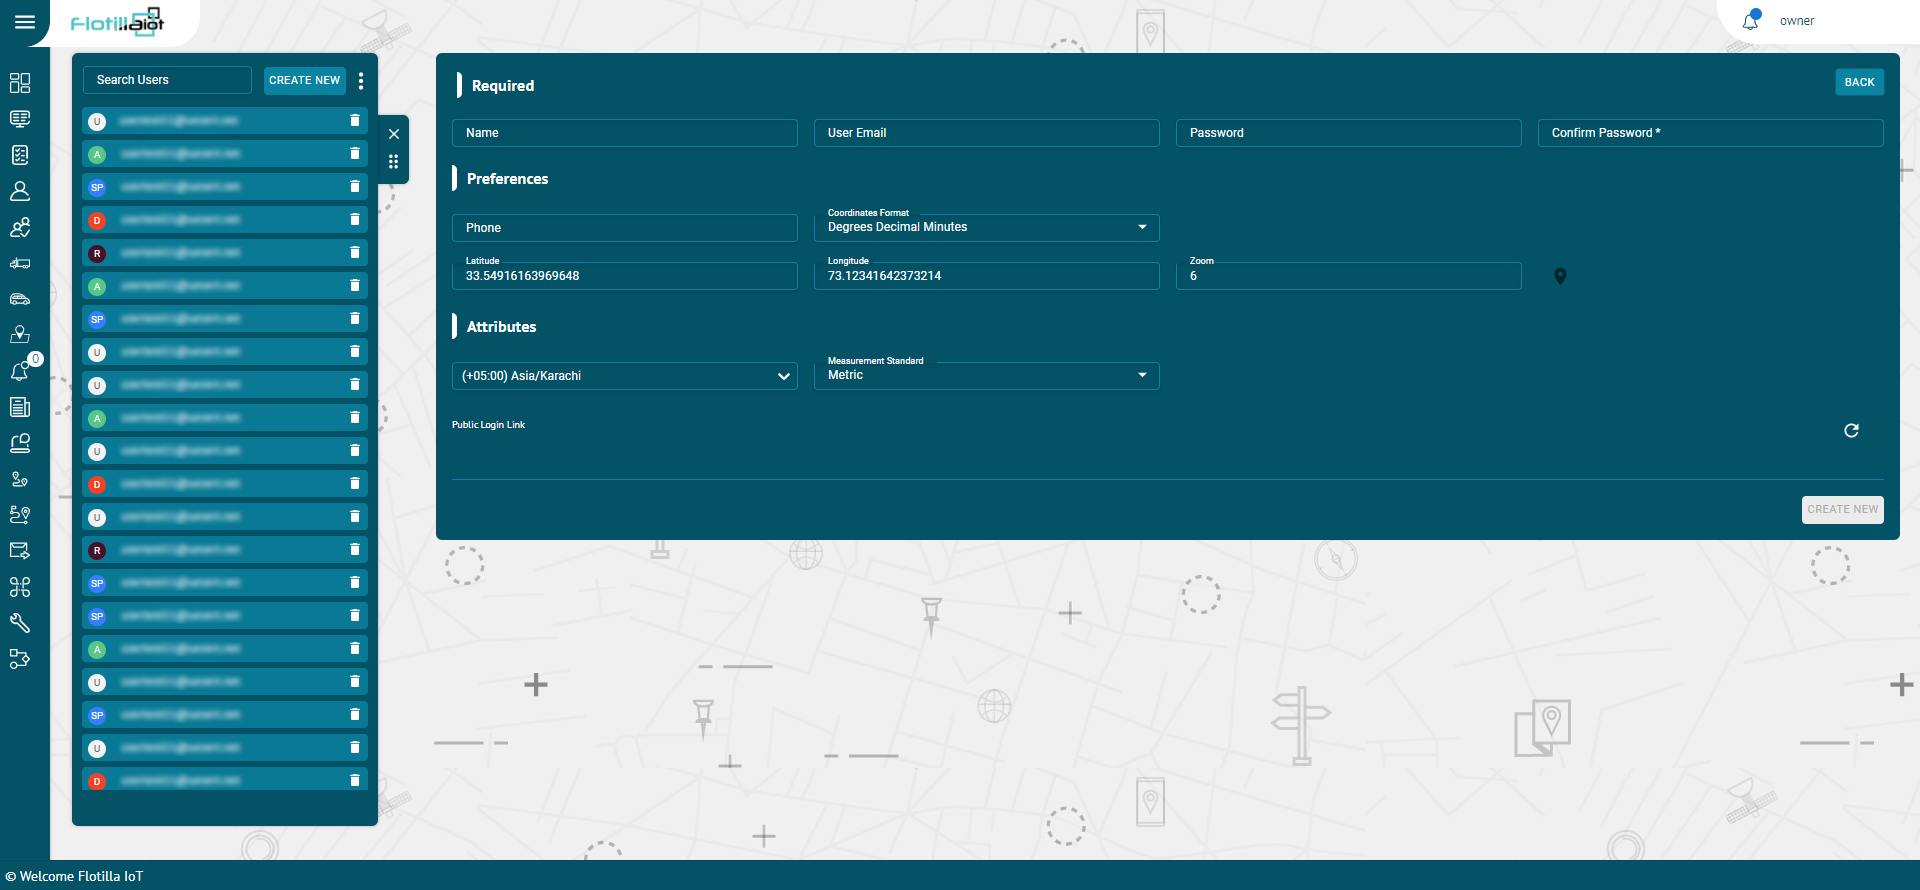
Create User
- Click on the Create new button from the Users tab module
- Enter the following required information of the user:
Name
- Set the specific name of the user
- Set the email of the user
Role
- Select the role of the user from the drop down list.
Preferences
Phone
- Set the phone number of the user. The phone number should be in the international format.
Map
- Select the map type for the user.
Coordinates Format
- Set the coordinates format from the dropdown
Latitude/ longitude
- Set the latitude, longitude to determine the location of the user.
Zoom
- Select the zooming limit of the map.
Permissions:
- The expiration date of the user is shown here.
Expiration
Unit Limit:
- The unit limit of the user is shown here.
User Limit:
- The user limit of the user is shown here.
Attributes
Time Zone
- Add the time zone of the user.
Measurement Standard
- Add the measurement standard for the user.
Currency
- Select the currency for the user.
View Model
- Check this checkbox to show model of the device for this user.
View IMEI:
- Check this checkbox to show IMEI of the device for this user.
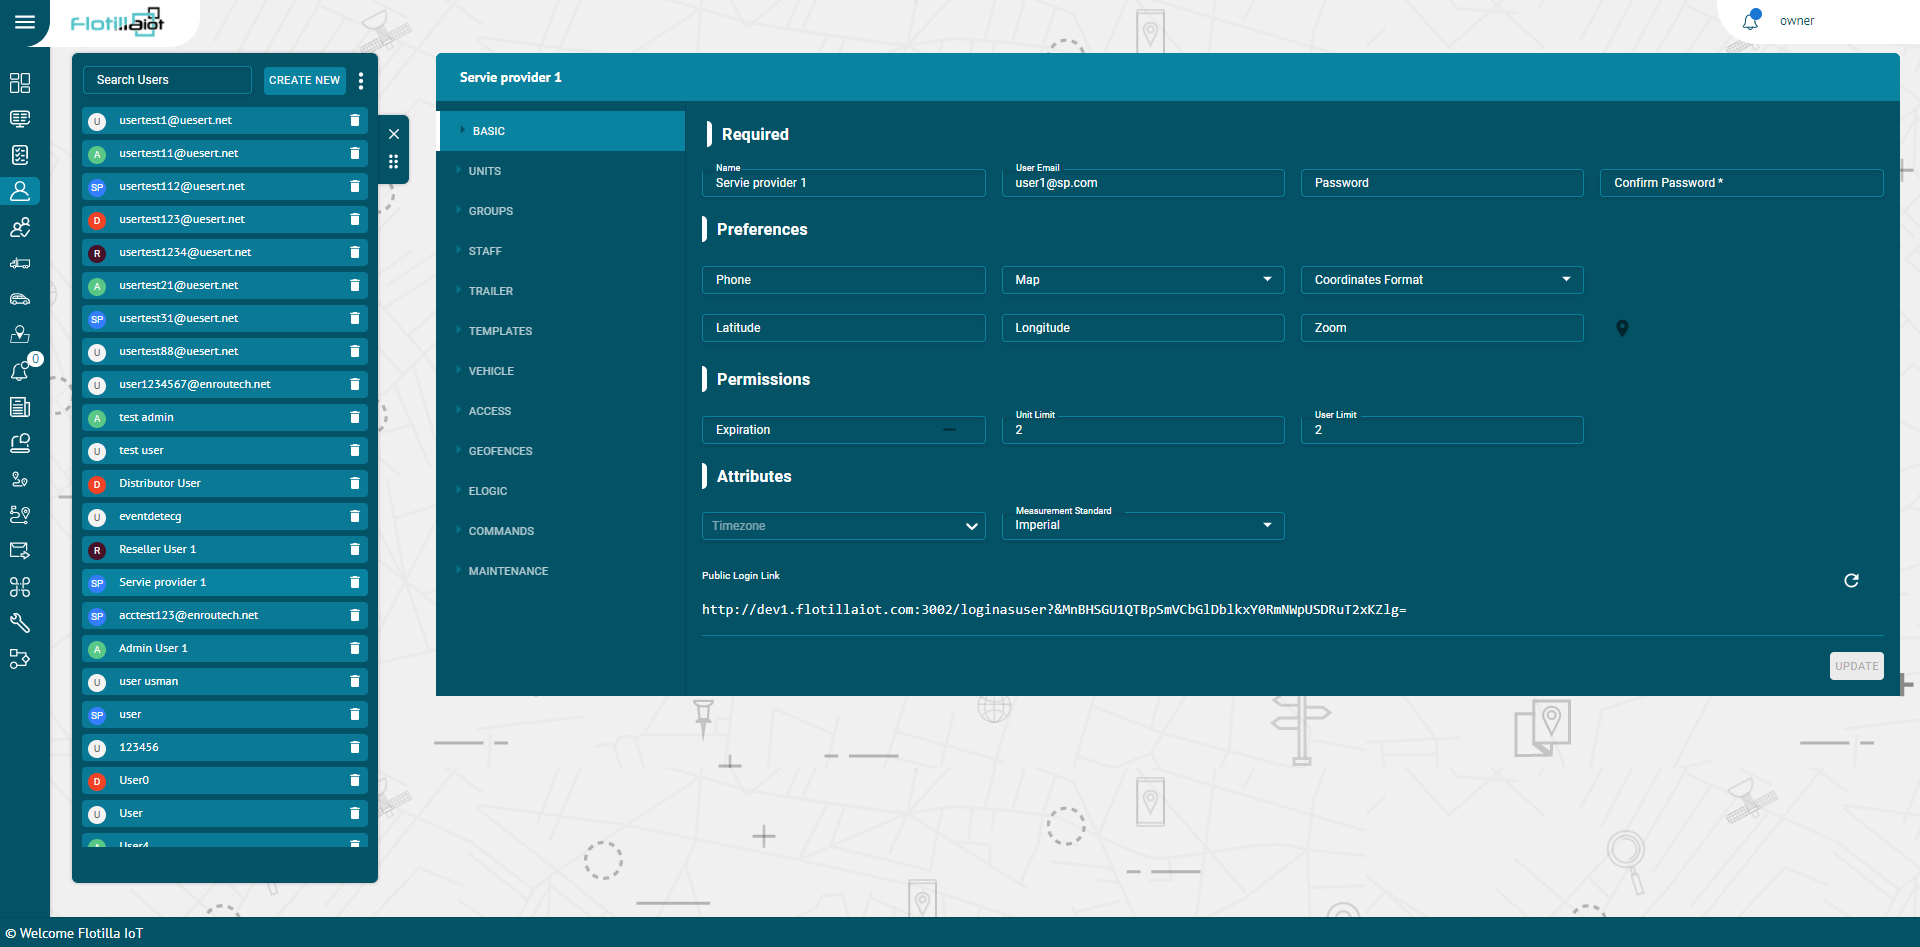
Search and View User
- To find the required user in the user’s list, use the search field above the staff list.
- Enter the required user name in the search field, the result will display.
- Click on the name of the user and following information will show up:
BASIC
- It contains the basic information of a user like name, email, phone etc.
CHANGE PASSWORD
- You can change password of a user by filling the password and confirm password fields.
UNITS
- It includes the different units that are either directly created by the user or created by a child of the user. By checking the checkbox, the unit can be assigned to the user.
RESOURCES
- It includes all the Resources that are either directly created by the user or created by a child of the user. By checking the checkbox, the resources can be assigned to the user.
STAFF
- It includes all the staff that are either directly created by the user or created by a child of the user. By checking the checkbox, the staff can be assigned to the user.
BINDERS:
- It includes the Binders that are either directly created by the user or created by a child of the user. By checking on the checkbox, the binders can be assigned to the user.
TEMPLATES:
- It includes the reporting templates that are either directly created by the user or created by a child of the user. By checking on the checkbox, the templates can be assigned to the user.
VEHICLE:
- It includes the vehicles that are either directly created by the user or created by a child of the user. By checking on the checkbox, the vehicles can be assigned to the user.
ACCESS
- It includes the different user accounts that are either directly created by the user or created by a child of the user. By checking on the checkbox, access of different users can be assigned to the user.
GEOFENCES
- It includes the geofences that are either directly created by the user or created by a child of the user. By checking the checkbox, the geofences can be assigned to the user.
ELOGIC
- It includes the different ELOGICs that are either directly created by the user or created by a child of the user. By checking the checkbox, the eLogic can be assigned to the user.
- Click on the CREATE NEW button and add description, attribute, expression and return type to create a new eLogic.
COMMANDS
- It includes different commands that are either directly created by the user or created by a child of the user. By checking the checkbox, the commands can be assigned to the user.
- Click on the CREATE NEW button and add description and data attribute to create a new command.
MAINTENANCE
- It includes different types of maintenance that are either directly created by the user or created by a child of the user. By checking the checkbox, the Maintenance can be assigned to the user.
- Click on the CREATE NEW button and add name, maintenance parameter, starting value and period to create a new maintenance.
Delete User
- Select the user on the users list and click on Delete icon next to the username
The user will be deleted successfully and will not be displayed in the users list
Update User
- Select the user on the users list.
- Make changes in the information available in Basic tab to update the user information
- Update the user required information.
- Click on UPDATE button.
The user information will be updated successfully.