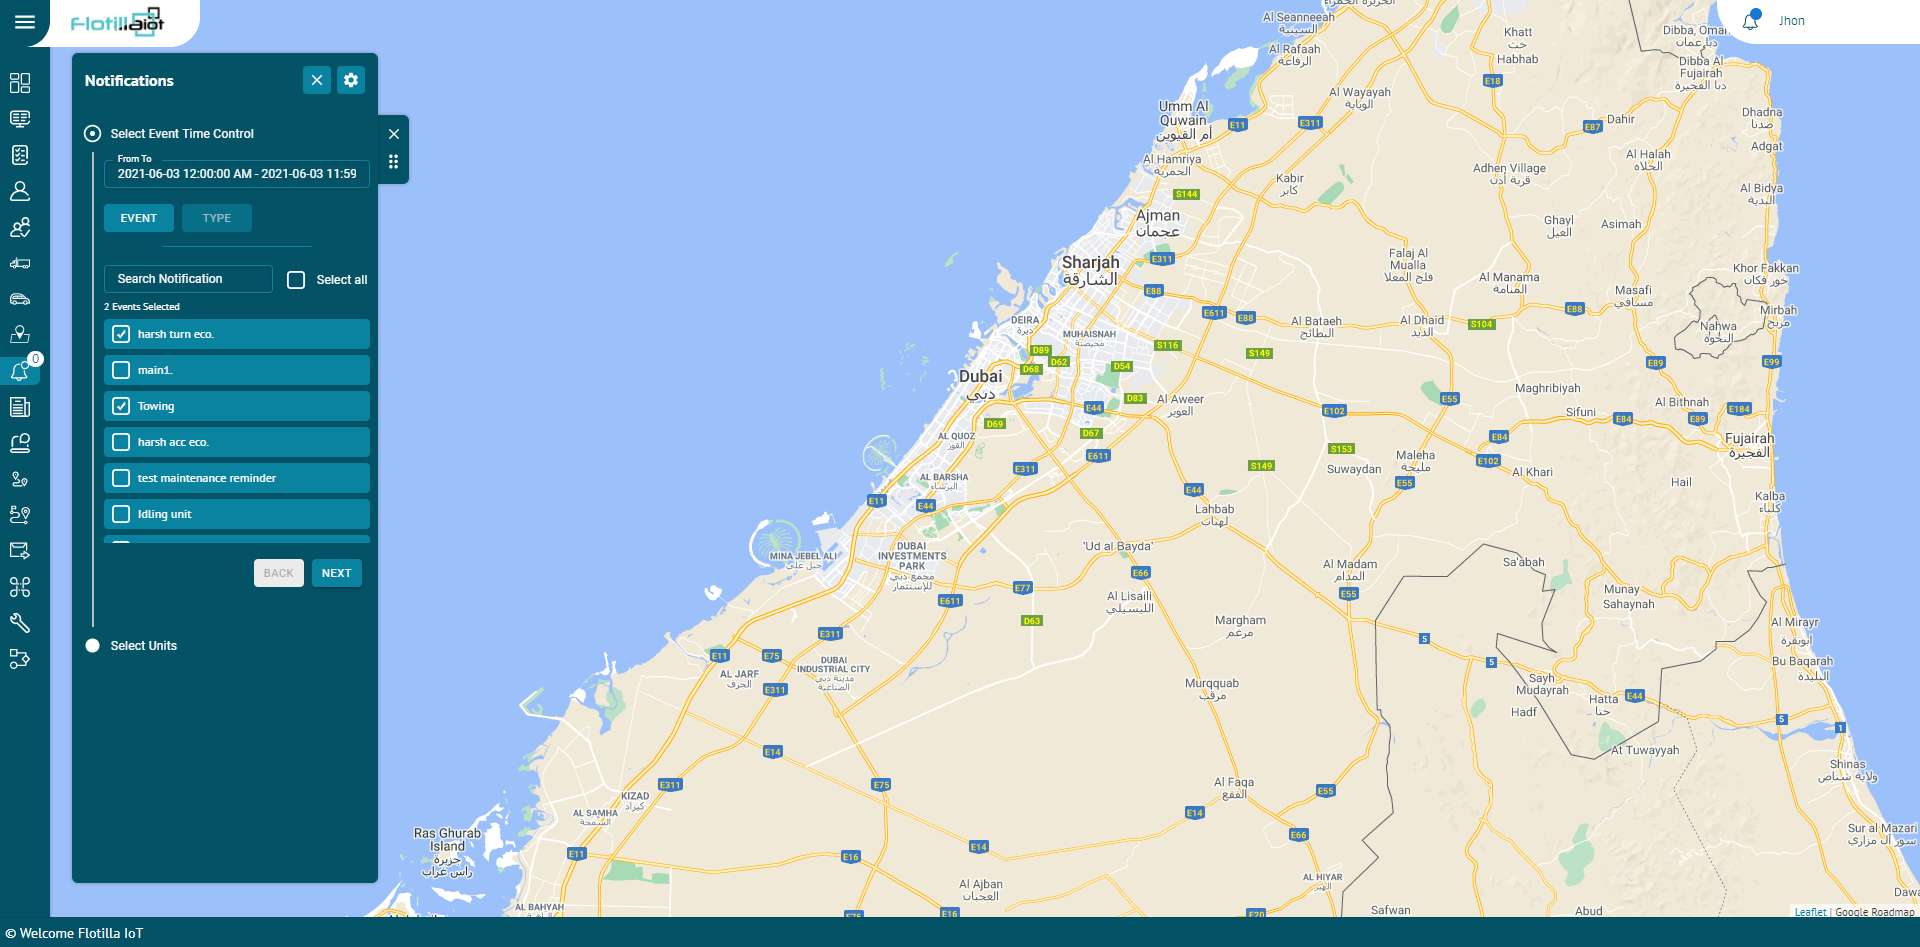
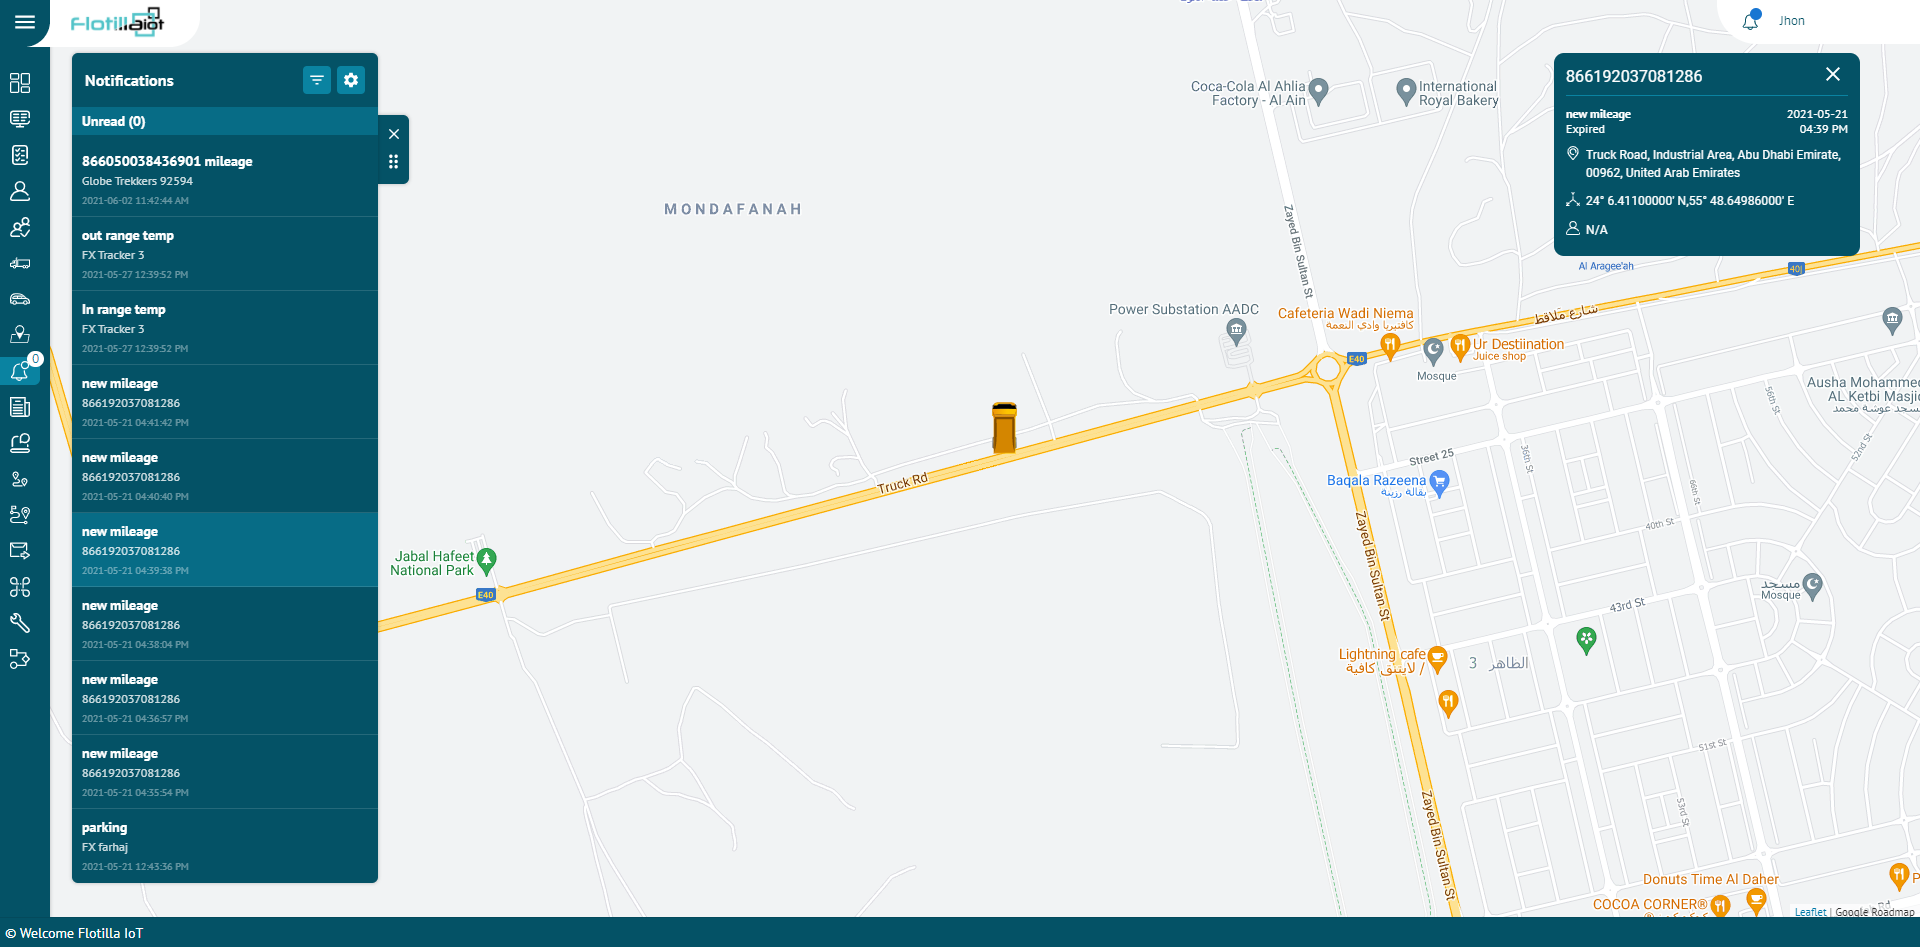
Events module allows user to manage different notification for units. In the flotilla IoT, users can be notified about any unit’s activity or change. It can be sensors values, change of location, speeding, and others. A notification can be displayed online in a popup window on the system. In this module, users can view the status of the notification of the units for any picked date. Notifications can be set for individual units or groups.
Create New
To generate a new event:
- Click the MANAGE option in the right next to notification filter.
- Click on the CREATE NEW button.
You can create notifications for following events:
Movement
- You can set the notification for individual units or groups.
- You can select the movement notification of various events like geofence entrance, exit, unit movement, unit stop, towing, idling etc.
- Geofence Entrance/Exit:
- Search Geofence: Search the geofence on which you want to apply the event by entering its name in the search field.
- Check the checkbox to select the geofence.
- Search Units: Search the unit on which you want to apply the event by entering its name in the search field.
- Check the checkbox to select the unit.
- Speed Limit Exceeded:
- Tolerance: Enter the speed value as a cushion to extend the max. limit.
- Min. Limit: Enter the min. speed value after which the notification will be triggered.
- Max. Limit: Enter the max. speed value till which the notification will be triggered.
- Check the checkbox to select the unit.
- Unit Stopped:
- Threshold: Enter the threshold time value after which the stop condition will be considered.
- Use Ignition: Check this checkbox to fetch the data from ignition.
- Check the checkbox to select the unit.
- Unit Moving:
- Select this notification type to get the alerts whenever unit starts moving.
- Check the checkbox to select the unit.
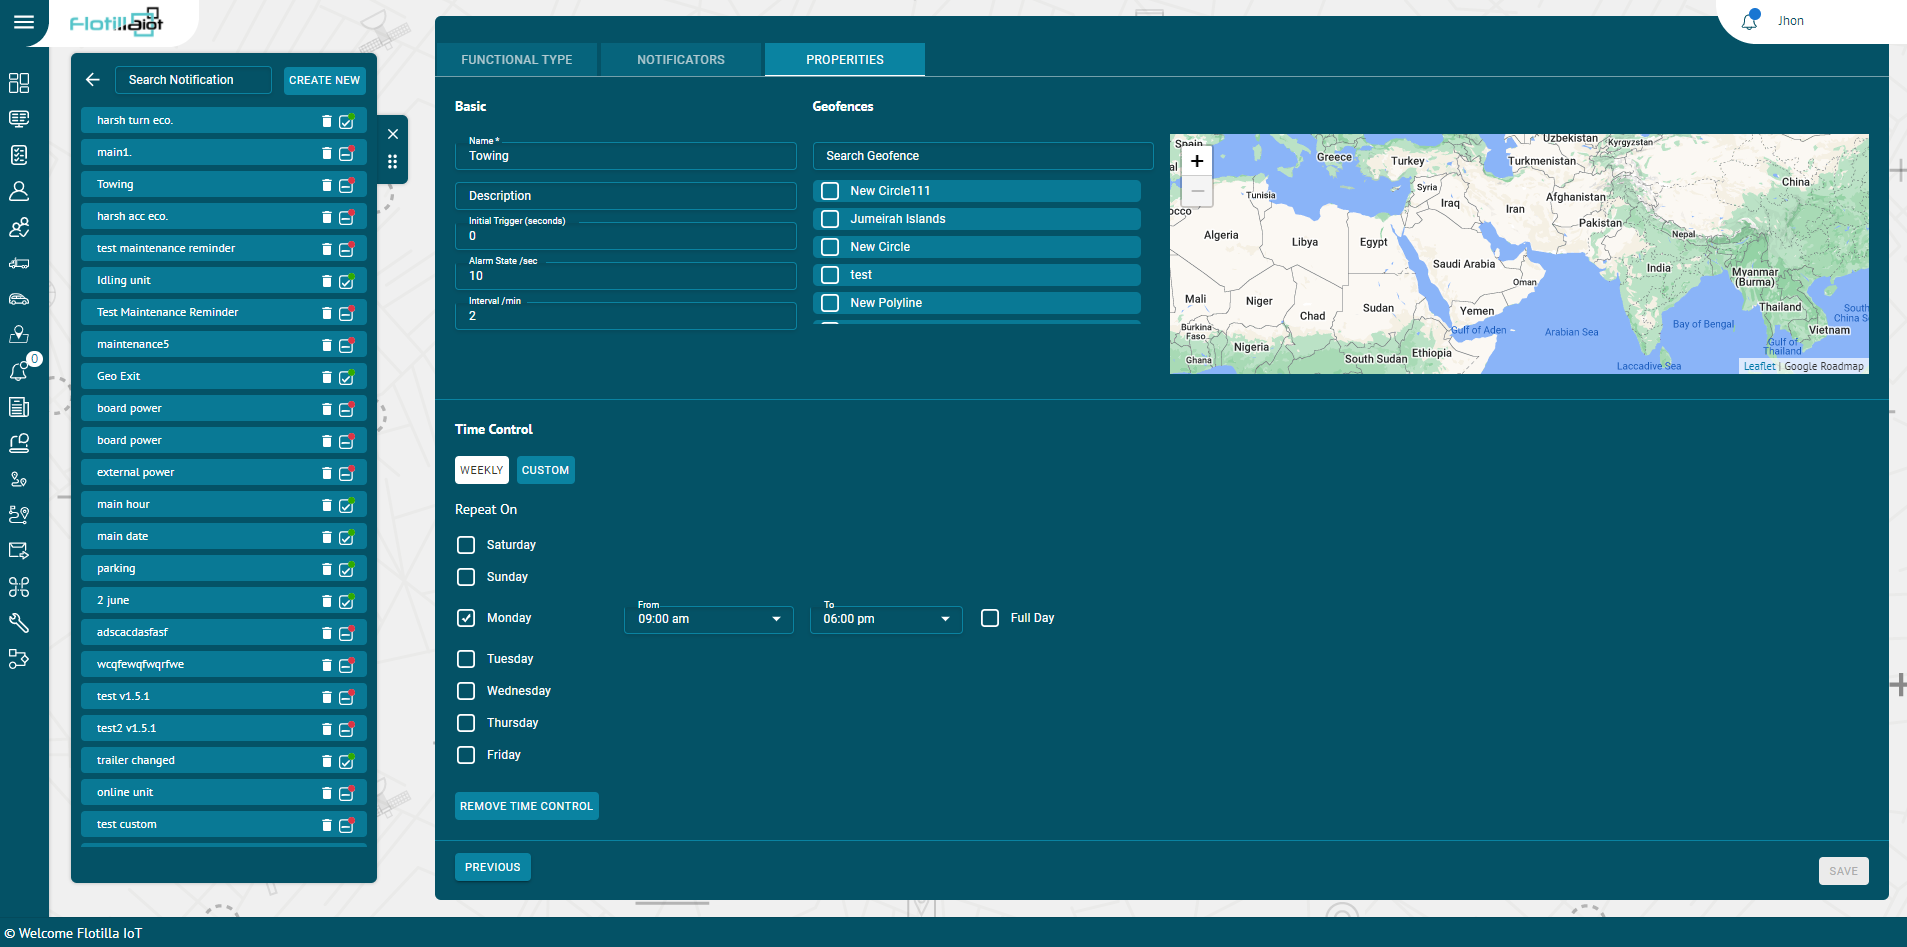
- Towing:
- Select this notification type to get the alerts whenever the unit starts towing.
- Check the checkbox to select the unit.
- Idling:
- Select this notification type to get the alerts whenever the unit starts idling.
- Select the threshold time value after which the idling condition will be considered.
- Check the checkbox to select the unit.
- Parking:
- Select this notification type to get the alerts whenever the unit starts parking.
- Select the threshold time value after which the parking condition will be considered.
- Check the checkbox to select the unit.
Maintenance Reminder
- Search the maintenance type for which you want to set the notification.
- Set the value at which you want to receive the notification in ‘Notify me on due’ option.
- Set the value at which you want a heads-up before the actual notification in ‘Remind Me Before’ option.
Digital
- Digital notifications can be set for various events like ignition, panic button, external power etc.
- Select the state (ON, OFF or both) for which you want to receive notification from the ‘State’ drop down list.
- Select the unit or group for which you want to assign notification.
- Click on Next button.
- Select NOTIFICATORS out of email, web popup, mobile notification and SMS by enabling the respective options.
- Click on Next button.
- Set the properties of the Notification including name, geofence, duration, timings etc.
- Click on the SAVE button.
Analog
- Analog notifications can be set for various events like fuel, temperature, RPM etc.
- Select the index which refers to the number of a particular notification. For example, if you are creating second fuel notification, the index will be 2.
- Select the maximum and minimum limit for which you want to receive notification from the drop down list.
- Check the ‘Trigger when’ option by checking In range or Out range option.
- Select the unit or group for which you want to assign notification.
- Click on Next button.
- Select NOTIFICATORS out of email, web popup, mobile notification and SMS by enabling the respective options.
- Click on Next button.
- Set the properties of the Notification including name, geofence, calendar (duration, timings) etc.
- Click on the SAVE button.
Detect
- Detect notifications can be set for various events like driver changed, passenger changed, trailer changed.
- Check the ‘Consider Null Value’ checkbox if you also want to accept null values.
- Select the unit or group for which you want to assign notification.
- Click on Next button.
- Select NOTIFICATORS out of email, web popup, mobile notification and SMS by enabling the respective options.
- Click on Next button.
- Set the properties of the Notification including name, geofence, calendar (duration, timings) etc.
- Click on the SAVE button.
Unit Status
- Unit status notifications can be set for various events like Connection restore, Status unknown, Connection loss.
- Select the unit or group for which you want to assign notification.
- Click on Next button.
- Select NOTIFICATORS out of email, web popup, mobile notification and SMS by enabling the respective options.
- Click on Next button.
- Set the properties of the Notification including name, geofence, calendar (duration, timings) etc.
- Click on the SAVE button.
Eco Driving
- Eco driving notifications can be set for various events like Harsh Brake, Harsh Turn, Harsh Acceleration, Harsh Bump.
- Select the tolerance value after which the notification will be triggered.
- Set the maximum and minimum limit between which you want to receive notification.
- Select the unit or group for which you want to assign notification.
- Click on Next button.
- Select NOTIFICATORS out of email, web popup, mobile notification and SMS by enabling the respective options.
- Click on Next button.
- Set the properties of the Notification including name, geofence, calendar (duration, timings) etc.
- Click on the SAVE button.
Fuel
- Eco driving notifications can be set for various events like Filling and Drain.
- In filling notification type, you will receive a notification whenever the fuel filling starts.
- In drain notification type, you will receive a notification whenever the fuel drainage starts.
- Select the unit or group for which you want to assign notification.
- Click on Next button.
- Select NOTIFICATORS out of email, web popup, mobile notification and SMS by enabling the respective options.
- Click on Next button.
- Set the properties of the Notification including name, geofence, calendar (duration, timings) etc.
- Click on the SAVE button.
Notificators
Users can receive notification on three mediums including:
- Email:
By enabling this option, you can receive notifications on user email or any customized email.
- Web Popup:
By enabling this option, you can receive notifications via web popups on the Flotilla web app.
- Mobile Notification:
By enabling this option, you can receive notifications on Flotilla IoT mobile app.
- Commands:
By enabling this option, you can set different customized commands to the device automatically whenever the notification is triggered.
- Click on Next button.
Properties
Basic
- Name:
Enter the name of the event in this option.
- Description:
Enter any description that you want to add for the notification.
- Alarm State/sec:
Enter the alarm state (in seconds) which is the duration for which you want to trigger the notification.
- Interval/min:
Enter the time interval (in minutes) which is the time duration between subsequent notifications.
Time Control
You can apply time control on the notification according to your requirement.
Weekly
Select the days on which you want to receive notification.
Custom
- Select the time span, dates and months at which you want to receive the notification.
- You can also select multiple time slots by clicking on the ‘ADD ANOTHER SLOT’ button.
- You can check the days on which you want to receive the notification.
- Check the month in which you want to receive the notification.
- Click on the SAVE button.