


The Monitoring module shows every unit in the fleet on a live map. Operators use it to track vehicle status, view locations, inspect sensors and monitor geofences from a single screen.
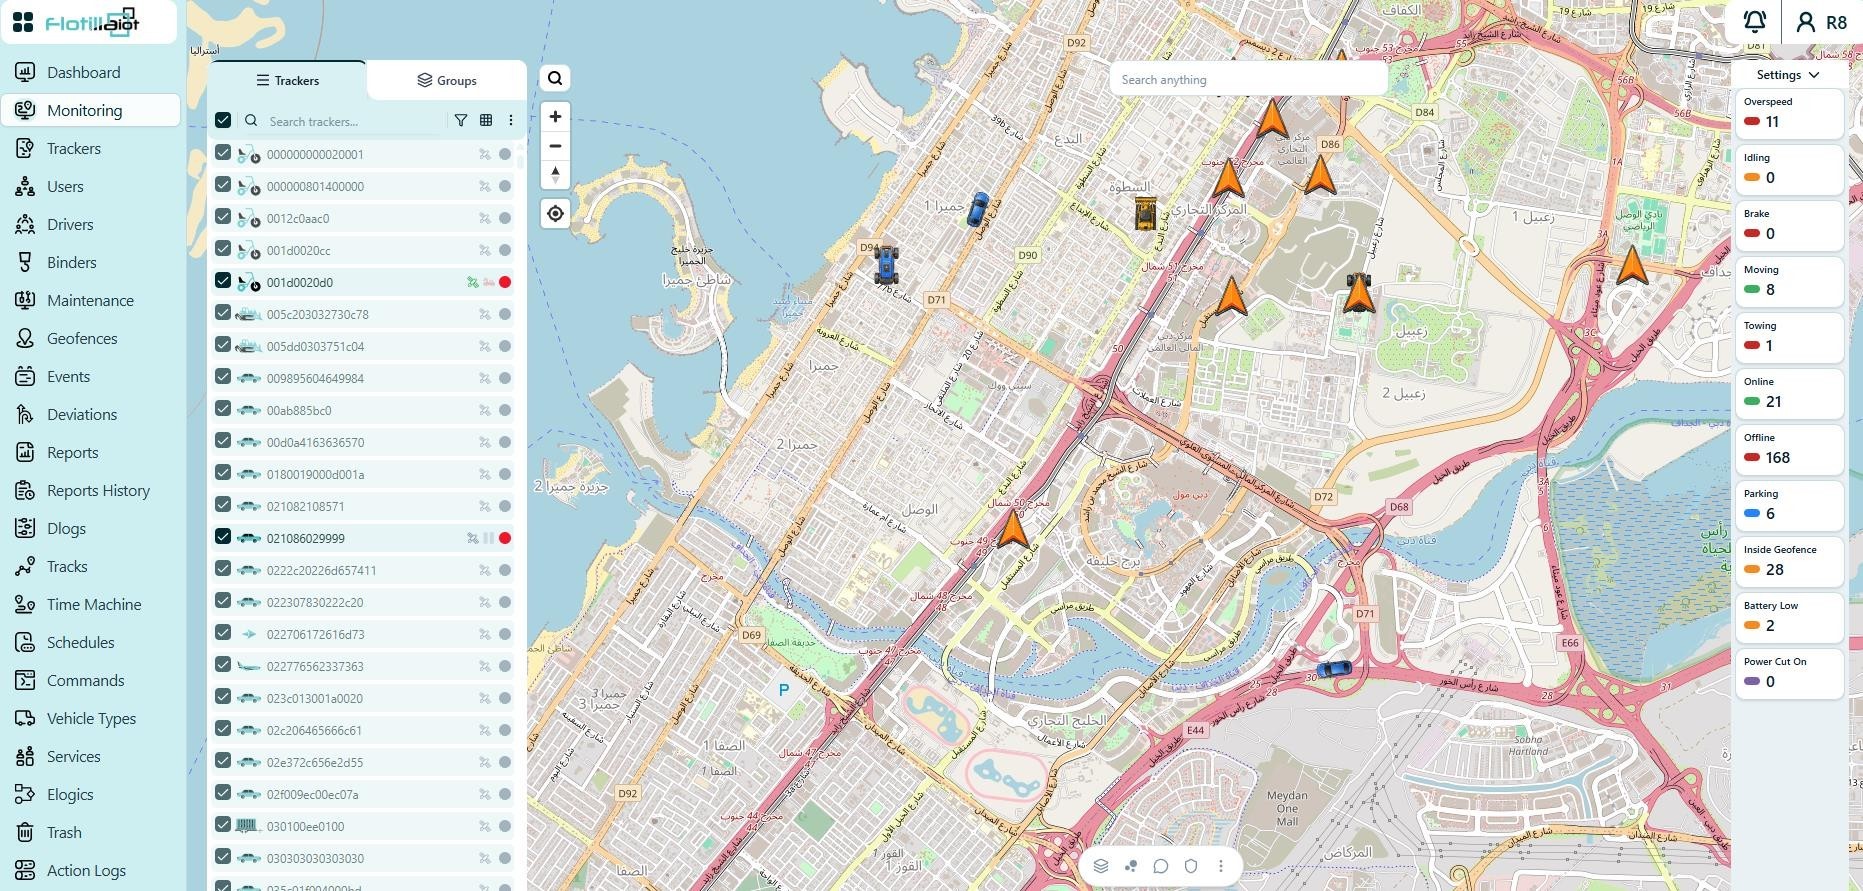
3.1 Tracker List
- All units are listed in the left panel with a live status indicator: green (online), red (offline), grey (not registered) and a P badge for parking.
- Use the checkboxes to choose which units are shown on the map.
- Use the search field, filter and grid view to find specific units quickly.
- The Groups tab shows units organized into tracker groups.
3.2 Live Status Counters
The Settings panel on the right shows live fleet counters: Overspeed, Idling, Online, Parking and Inside Geofence.
3.3 Unit Details Panel
Click a unit’s information icon to open its details panel. The panel contains:
- Header — unit name, IMEI, current motion state and live speed.
- Tracker Info — odometer and engine hours.
- Location — address, coordinates, direction, HDOP, satellite count, ignition and motion state, parking duration, device model, last tracker update, last GPS update, device status and protocol.
- Geofences — the geofences the unit is currently inside.
- Sensors — live sensor values such as Eco Score, Driver ID, Ignition, Board Power, Coolant Temperature, Odometer and Engine Hours.
- Trailer, Bin, Passenger and Driver — the binders and driver assigned to or detected on the unit.
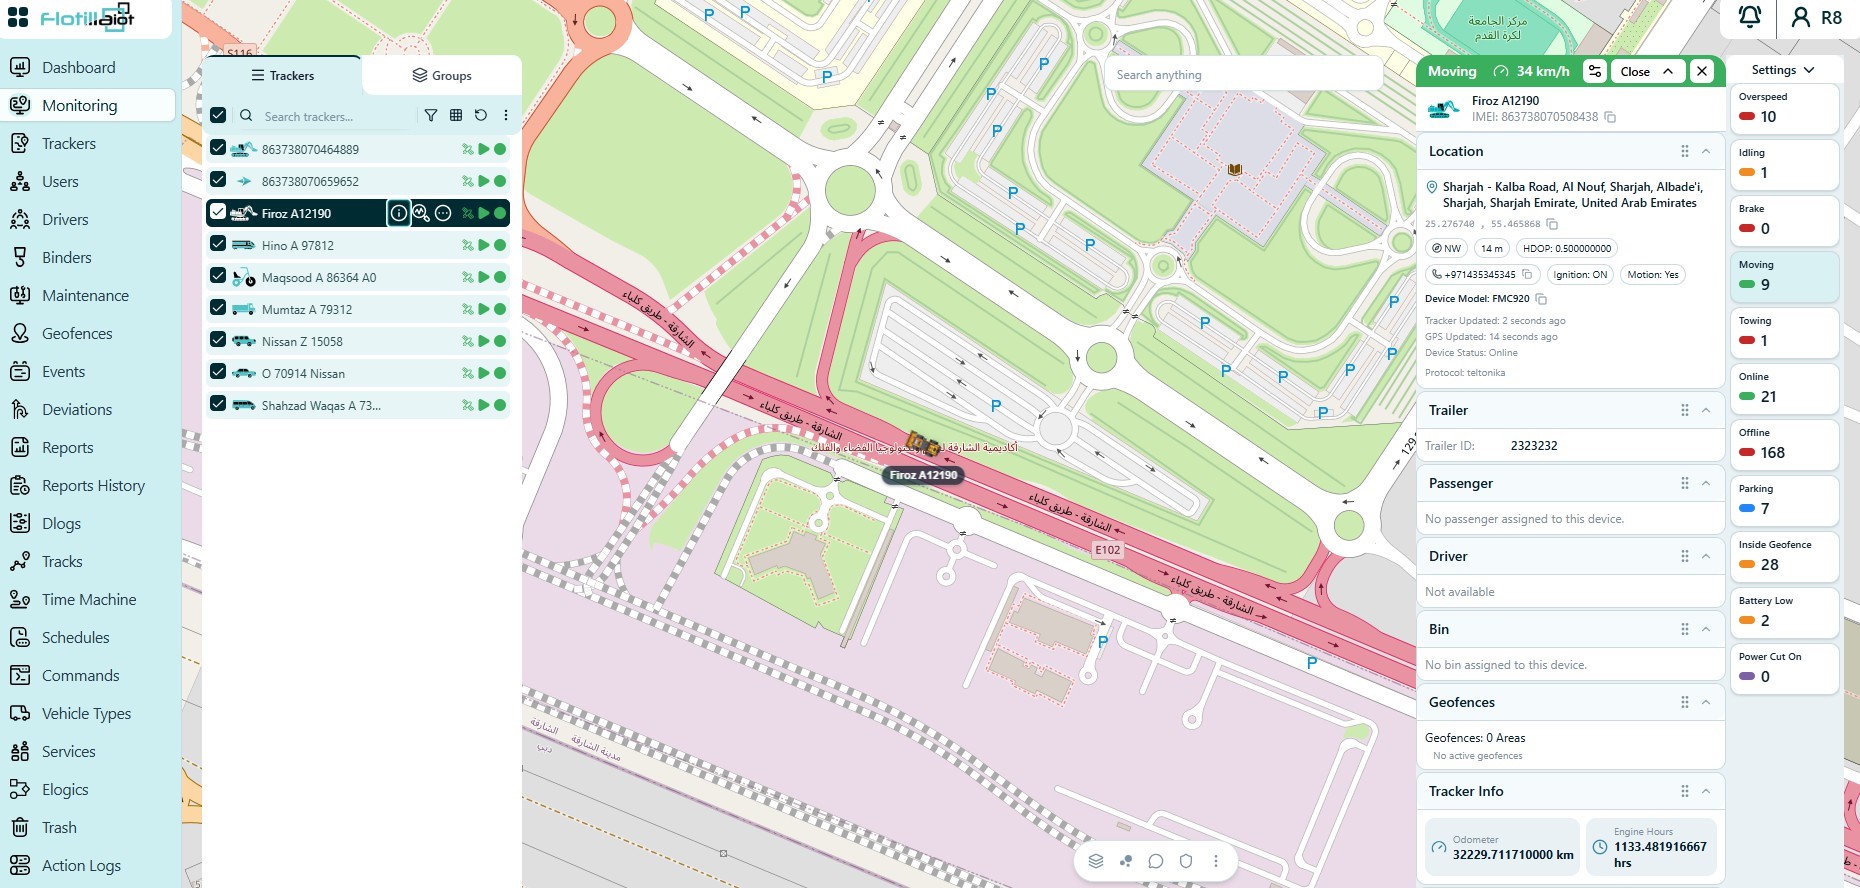
3.4 Map Tools
- Zoom, pan and locate controls on the left side of the map.
- A Search anything box to find places and addresses.
- Toggles at the bottom of the map for map layers, clustering, traffic, labels and the geofence overlay.
3.5 Typical Workflow
- Choose the units to show, using the checkboxes, search, filter or the Groups tab.
- Check the live counters in the Settings panel for a quick fleet overview.
- Open a unit’s information icon to review its location, sensors, geofences, binders and driver.
- Adjust the map with the map tools as needed.
- Send any commands assigned to the unit directly from this module (see Chapter 18).