


The FLOTILLA IoT FMS Platform brings live tracking, vehicle and driver management, maintenance planning, alerts and reporting together in one web application. This chapter introduces the modules, explains how to move around the platform, and gives a recommended order for setting up a new fleet.
1.1 Platform Modules
The platform consists of the following modules. Each one is described in its own chapter.
| Ch. | Module | What it does |
|---|---|---|
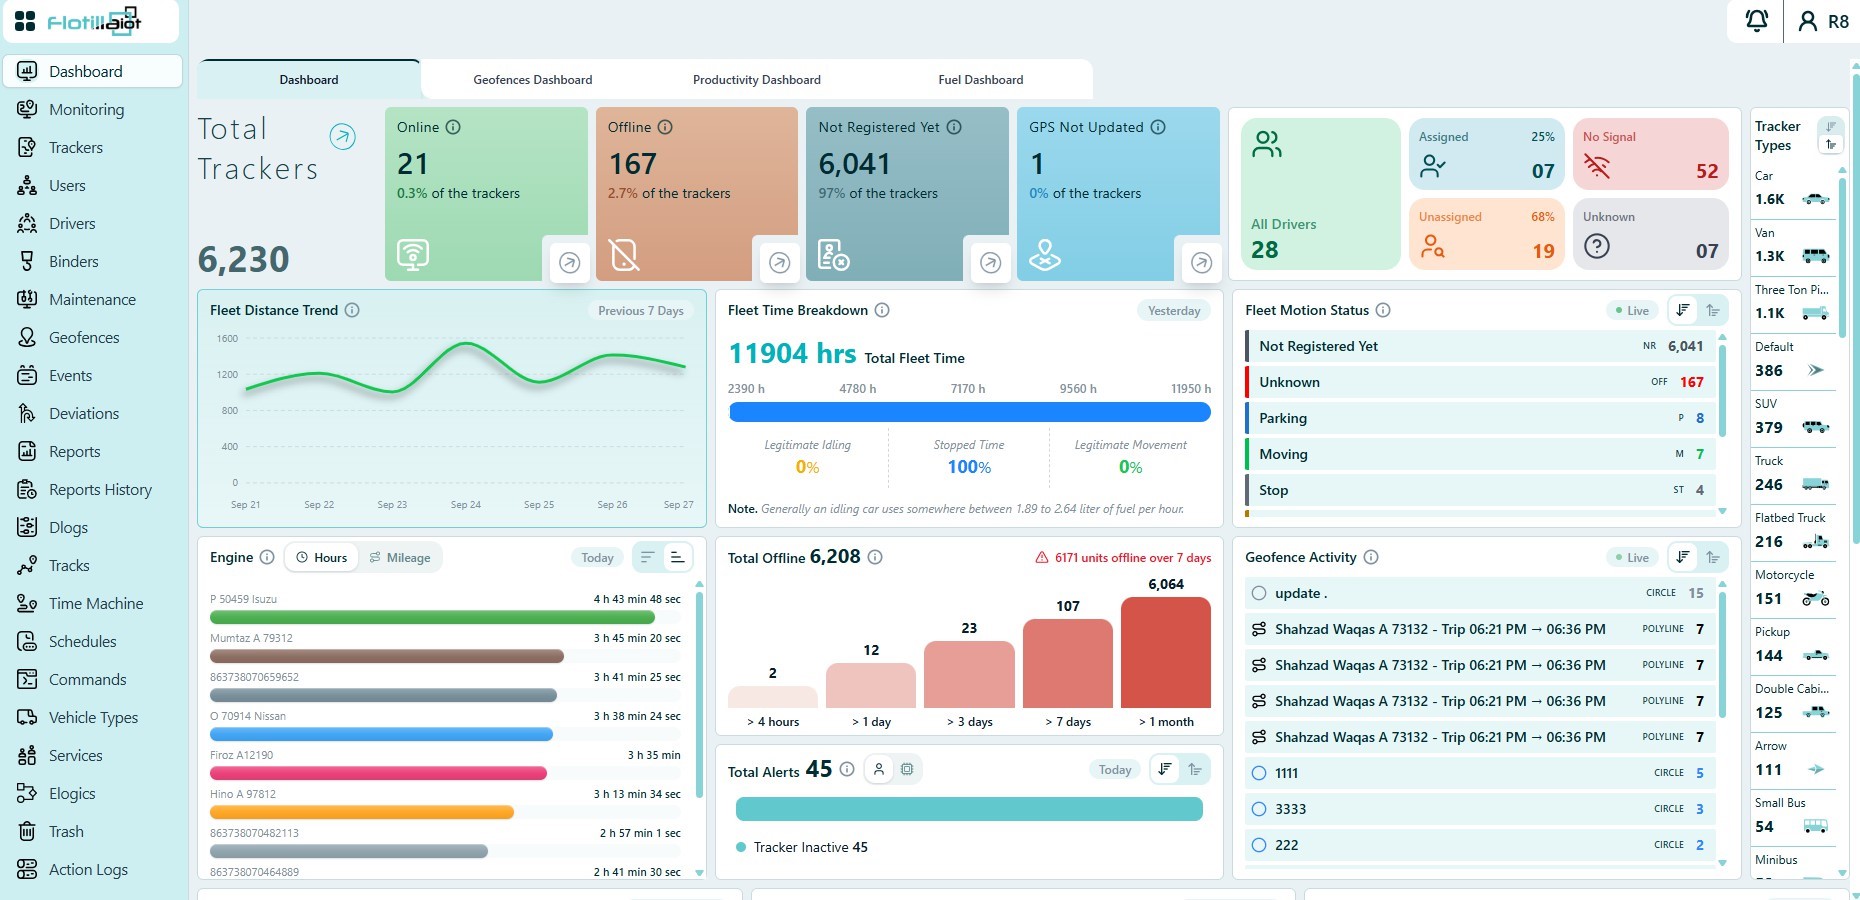
| 2 | Dashboard | Real-time overview of fleet status, motion, engine usage, alerts and geofence activity, with separate Maintenance, Geofences, Productivity and Fuel dashboards. |
| 3 | Monitoring | Live map-based tracking of units, sensors and geofences. |
| 4 | Trackers | Registration and full configuration of tracking units, sensors, fuel and eco-driving rules. |
| 5 | Users | Creation and management of platform users, roles and access rights. |
| 6 | Drivers | Management of drivers, driver IDs and driver groups. |
| 7 | Binders | Management of binders (passengers, trailers and other assets) linked to units. |
| 8 | Maintenance | Service reminders, due tracking and maintenance expenses. |
| 9 | Geofences | Creation and management of geographic zones for monitoring and alerts. |
| 10 | Events | Notifications triggered by fleet activity and device data. |
| 11 | Deviations | Planned routes with stops and time rules, and detection of route deviations. |
| 12 | Reports | Generation and export of detailed and summary operational reports. |
| 13 | Report History | Access to previously generated reports. |
| 14 | D-Logs | Review and graphing of raw device data. |
| 15 | Tracks | Visualization and replay of vehicle trips on the map. |
| 16 | Time Machine | Historical playback of vehicle movement. |
| 17 | Schedules | Automated report generation and email delivery. |
| 18 | Commands | Remote commands sent from the platform to devices. |
| 19 | Vehicle Types | Custom vehicle type labels for classification. |
| 20 | Services | Services and sub services, with their prices. |
| 21 | E-Logics | Custom logic rules and automation. |
| 22 | Trash | Deleted records and data retention management. |
| 23 | Action Logs | Audit trail of system activities and user actions. |
1.2 Navigating the Platform
Every screen shares the same layout, so once you know one module you can find your way around the others:
- Main menu — the menu on the left lists every module. The module you are working in is highlighted.
- Top bar — the bell icon at the top right gives access to notifications, and the profile menu shows the signed-in user.
- Lists and panels — most modules show a list or panel on the left and the map or details on the right.
- Add buttons — buttons such as + Add Tracker, + Add User or + Add Reminder create a new record.
- Search and filters — the search box and Add Filter control at the top of each list help you find records quickly.
- Row actions — the actions menu at the end of each row opens, edits or deletes that record.
1.3 Quick Start: Setting Up Your Fleet
When you set up a new fleet, the following order gives the best results. Each step points to the chapter with full details.
- Register your trackers in Trackers with + Add Tracker, and make sure each device sends data to the server address and port shown in the form (Chapter 4).
- Configure each unit — sensors, mileage and engine hours, fuel settings and eco-driving rules — in Trackers → Unit Settings (Chapter 4).
- Add users and grant each one access to the trackers and modules they need (Chapter 5).
- Register drivers and binders such as passengers and trailers, and link them to units (Chapters 6 and 7).
- Create geofences for depots, customer sites and other important locations (Chapter 9).
- Set up notifications for the events that matter to your operation, such as speeding or geofence entry and exit (Chapter 10).
- Plan maintenance by creating reminders based on mileage, engine hours or date (Chapter 8).
- Automate reporting by scheduling the reports your team needs every day, week or month (Chapter 17).
1.4 Signing In and Account Basics
You work with the platform in a web browser. Your administrator gives you the platform address and your sign-in details.
- Sign in with your user name or email and your password.
- Profile menu — the profile menu at the top right shows the signed-in user.
- Notifications — the bell icon next to the profile menu opens the notifications panel (Chapter 10).
1.5 Working with Groups
Several modules let you organize records into groups, so that you can select a whole group at once instead of picking records one by one:
| Groups | Where you manage them | Where they help you |
|---|---|---|
| Tracker groups | Monitoring → Groups tab | Choosing units in Monitoring, and choosing Trackers/Groups when you generate a report (Chapter 12). |
| Driver groups | Drivers → Driver Groups tab | Organizing drivers for reporting (Chapter 6). |
| Binder groups | Binders → Groups tab | Organizing passengers, trailers and other assets (Chapter 7). |
| Geofence groups | Geofences → Group tab | Organizing geofences on the map (Chapter 9). |