


The Role Management module defines the roles that you give to users. A role is a set of permissions: it decides what a user can see and do on the platform. The role of each user is shown in the Role name column of the Users list (Chapter 2).
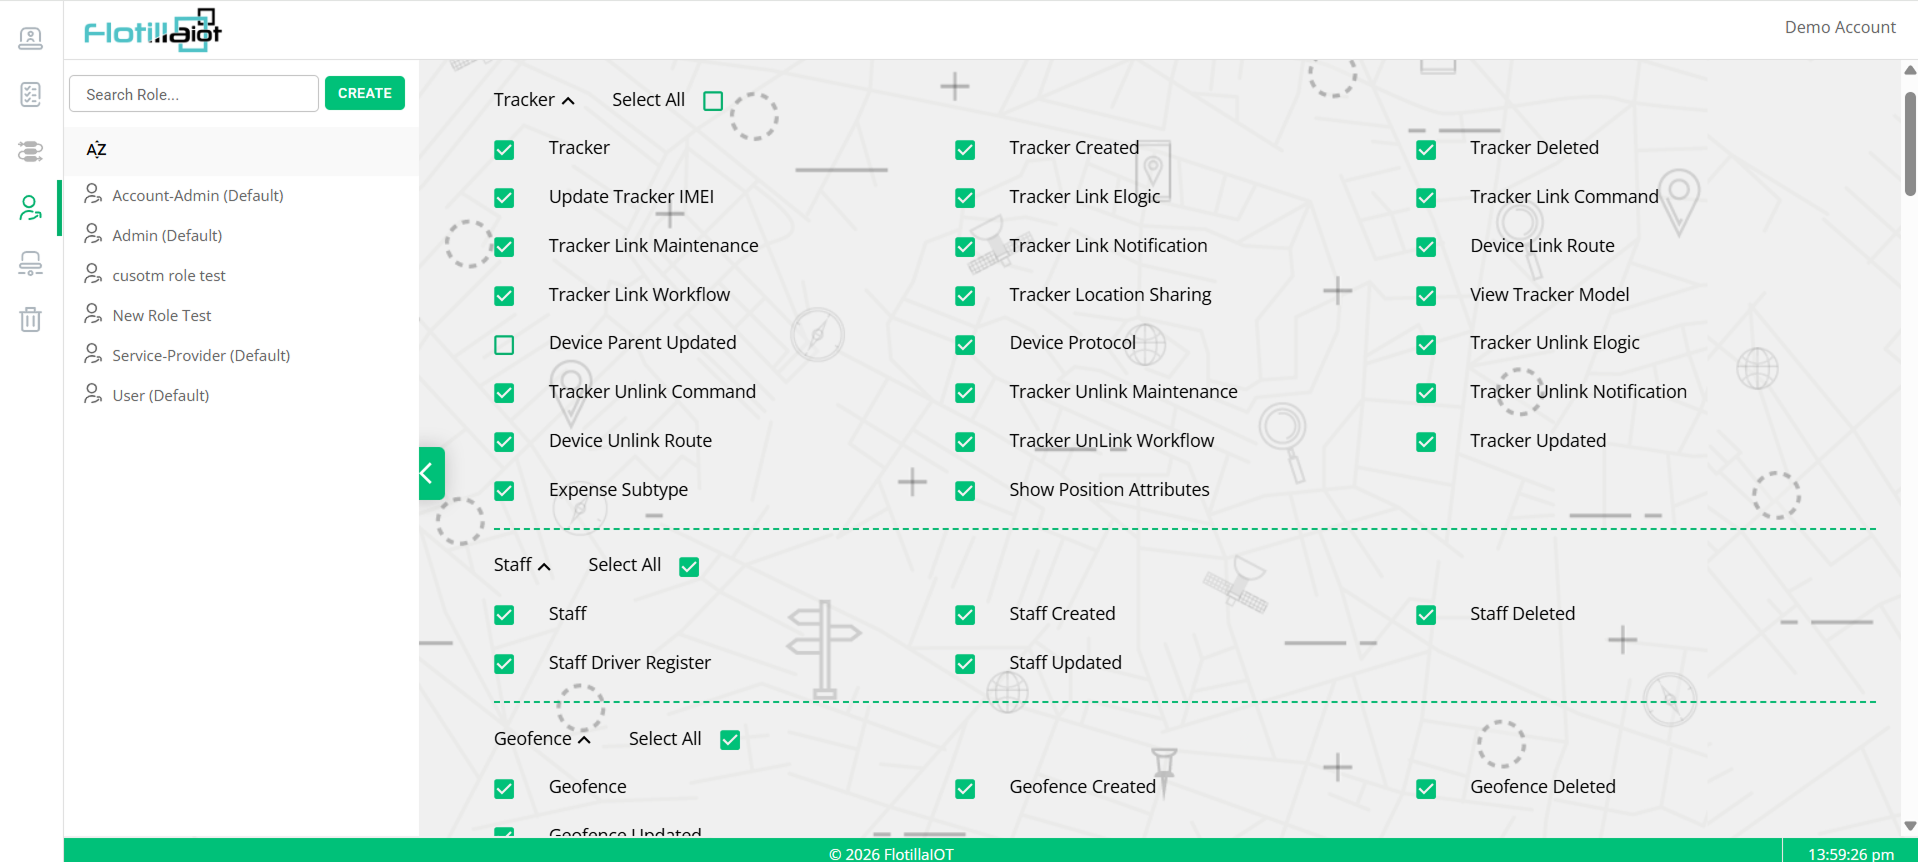
5.1 The Role Management Screen
- Role list (left) — the Search Role box, the CREATE button and the list of roles. The A–Z icon sorts the list.
- Permissions (right) — the permissions of the selected role, in groups such as Tracker, Staff and Geofence. Scroll down to see more groups.
- Panel tab — the green arrow tab on the panel edge hides or shows the role list.
5.2 Default and Custom Roles
| Type | Examples |
|---|---|
| Default roles | Ready-made roles marked (Default): Account-Admin (Default), Admin (Default), Service-Provider (Default) and User (Default). |
| Custom roles | Roles created for a specific need, for example New Role Test. |
5.3 Reading the Permissions
Each group has a heading with a collapse arrow and a Select All checkbox. A ticked box means the role has that permission. Select All is ticked when every permission in the group is on, and empty when at least one is off. In Figure 5.1, for example, Select All is empty in the Tracker group because Device Parent Updated is not ticked.
Permissions follow a clear pattern. The entry named after the group (for example Tracker) concerns the group as a whole, and further entries cover creating, updating and deleting (Tracker Created, Tracker Updated, Tracker Deleted). The Tracker group also has link and unlink permissions:
| Theme | Permissions in the Tracker group |
|---|---|
| Create, update, delete | Tracker, Tracker Created, Tracker Updated, Tracker Deleted, Update Tracker IMEI, Device Parent Updated |
| Linking and unlinking | Tracker Link / Unlink for E-logic, Command, Maintenance, Notification and Workflow; Device Link Route and Device Unlink Route |
| Viewing and sharing | View Tracker Model, Device Protocol, Tracker Location Sharing, Show Position Attributes |
| Other | Expense Subtype |
The Staff group covers Staff, Staff Created, Staff Updated, Staff Deleted and Staff Driver Register. The Geofence group covers Geofence, Geofence Created, Geofence Deleted and more.
5.4 Creating a Role
- Click CREATE above the role list.
- Enter a clear name for the role.
- Tick the permissions the role needs. Use Select All to switch a whole group on or off, then adjust single permissions.
- Save the role, then give it to users in the Users module (Chapter 2).
5.5 Changing a Role
- Find the role with Search Role or by scrolling the list.
- Select it. Its permissions appear on the right.
- Tick or untick the permissions and save your changes.
IMPORTANT A change to a role applies to every user who has that role. Check the Role name column in the Users list before you change a role that is widely used.